This content contains affiliate links. If you make a purchase after clicking a link on this page, we might receive a commission at no cost to you.
From time to time, it’s a good idea to conduct a thorough cleaning of your electric smoker. Like all smoker grills, too much build up of burned food and grease can lead to damage, or more likely, a decrease in your smoker’s cooking performance. So, many ask: How to clean an electric smoker?
If you know what to do, routine cleaning of an electric smoker is actually quite easy. In this post, we’ll go over everything you need to know how to clean an electric smoker. By the end, you should know how to keep your unit in prime condition for years to come!
We’ll go over a few different extreme scenarios for how to clean an electric smoker in this post, but it’s important to note that the best thing you can do is have a consistent, preventative cleaning routine. This way, you’ll never get to a point with your smoker where you’re risking irreversible damage!
I’d also like to add that the technique we’re about to go over works universally, so no matter which brand of electric smoker you own, you can use this article as your guide!
Things You’ll Need to Clean Your Smoker
To make things easier, you’ll need a few materials on hand. Here’s a quick list of items you should round up (plus some of the specific products we like to use) to clean electric smokers.
Trash bag or trash bin
Non-abrasive cleaner (I like to use a mild dish detergent
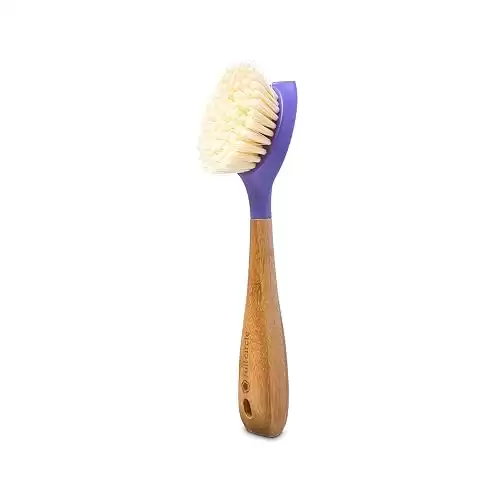
Non-abrasive brush (no metal – the bristles should be soft as to not scratch your smoker)
Soft cloth or rag
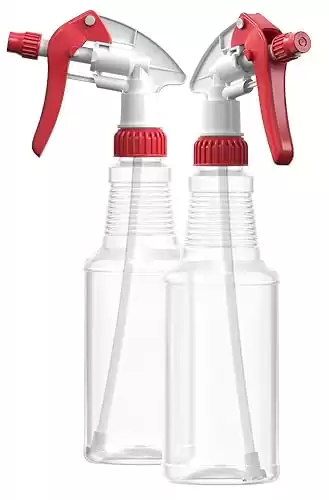
Spray bottle
Sponge
Optional: Tarp or sheet to put under the smoker. If you are cleaning outdoors this is not as big of a deal
How to Clean an Electric Smoker – Routine Cleaning
Take Out All Removable Parts
The first thing you’ll want to do is to remove any removable parts from your smoker. This will make the cleaning process for both the parts and the smoker itself much easier.
Typically, the racks, drip tray, smoker box, and water pan are all removable. There might be some additional parts that you can take out depending on which model you own.
Scrub the Smoker’s Cooking Chamber
Now that all of the removable parts are out of the way, take your brush and scrub down the entire inside of your smoker – or the cooking chamber.
I like to work from top to bottom to ensure that I don’t have to redo any areas. You’ll want to make sure you work extra hard on areas where there’s lots of buildup.
This has a tendency to happen in corners and in areas next to where the racks sit, so spend a little extra time in these areas.
By the time you make it to the bottom, there will be a pile of soot and particles that you just got through scrubbing off. Transfer these particles to a trash bag or sweep them out onto your tarp under the smoker.
Soap the Cooking Chamber
Scrub down the cooking chamber a second time, this go around spray it down first with your non abrasive cleaner. I do this by putting mild dish detergent into a spray bottle. After you spray everything down, scrub from top to bottom again. Once through, use your sponge and/or rag to wipe everything clean.
Important Note: Never ever use abrasive or harsh chemicals to clean the inside of your smoker!
Clean the Smoker Rack
Now that the main cooking chamber is clean, it’s time to move on to the racks. To be clear, it’s good practice to at a minimum scrub down your racks after every cook.
The procedure we’re about to outline can be done after every few cooks if you’d like, but doing it after each use won’t hurt.
First we recommend you soak the racks in soapy water for at least 30 minutes to soften up any residue build up. From there, you’ll want to take a scrub and scrape off any remaining clumps of food or residue.
You can feel free to use a more abrasive scrub than you used for the cooking chamber, but I still would highly recommend using something less abrasive than a metal scrub.
It’s best to use warm soapy water while you scrub to make things as easy as possible. 99% of the time, this will be enough to get the job done!
Pro Tip: Use a light amount of vegetable oil on your smoker and racks when you cook. A light layer will help prevent rusting and will also make food particles less likely to stick.
Clean the Window
Many people I know overlook this aspect of cleaning your electric smoker, but it’s incredibly important to clean the window. Mostly because you want to be able to have a clear view of your meat and how the cook is going. A dirty window won’t allow you to do that!
To do this, mix some light soap with warm water and spray down both sides of the window. Make sure the cleaning solution covers the entire area of the window. Let the mixture soak on the window for at least a minute.
From there, take a rag and wipe down the window. You may need to repeat this process again to make sure there aren’t any streaks.
Pro tip: Get one end of your rag or towel damp and keep another end dry. On the first wipe down, use the damp end. On the second wipe down, use the dry end to eliminate any streaks!
Clean the Electric Smoker Exterior
After cleaning the interior and all of the removable pieces, it’s time to give the exterior of your smoker a wash. Make sure to pay attention to the door seal and give it a wipe after each cook.
For the exterior, use a light soap and warm water solution to spray the outside down. From there, wipe with a rag or towel until the entire exterior is clean.
At this point, it’s also important to make sure you’ve also cleaned any built in thermostats or temperature probes.
How to Clean an Electric Smoker That Has Mold
It goes without saying that mold growth is the last thing you want on a piece of equipment that you use to cook food. Unfortunately, electric smokers are actually quite prone to mold growth, especially if you don’t follow the cleaning steps above on a regular basis.
Mold festers in dark places where moisture is present. If you go through somewhat lengthy periods of time where you don’t use your smoker, odds are you’ll store it in a dark place like a closet or pantry. There’s also enough moisture in most indoor environments to allow for mold growth.
If you suspect or see mold growth in your electric smoker, follow these steps to deep clean and remove the mold.
Remove Everything From Inside the Electric Smoker
Take out all racks and removable parts. Take out and wipe down/clean the smoker box.
Turn Up the Heat
Mold can’t withstand scorching heat. Next, you’ll want to heat up the smoker just like you were about to use it to cook. I’d recommend having the heat running for at least 30 minutes to burn up the mold spores inside of your unit.
Heating your smoker up will burn almost all of the mold out of your unit. It also will have the added benefit of loosening up any residue or other particles that may be lodged in your smoker.
Give It a Scrub
After a good burn, turn the heat off and let your unit cool down. After it’s cooled, put on a mask over your nose and mouth to filter the air, as moldy air is terrible for your health. Once your safety mask is on, give your electric smoker a deep clean using the exact same process we’ve already outlined above in this post.
Get Back to Cooking
That’s it! The next time you heat up your smoker to begin a cook, you should be good to go. Once again, the heat will burn up any minor remaining residue, and you are ready to smoke again!
Seasoning (Curing) Your Electric Smoker
One more important note in this guide to how to clean an electric smoker is that you need to make sure to cure (or season) your electric smoker before its first use.
Curing is crucial because many smokers are mass produced in factories. Often times, there is still residue or other agents inside of your smoker that are a byproduct of the production process. It goes without saying, but you want to make sure all of that is completely eliminated before you start cooking food!
Basically, you’ll want to do the exact process you’d use as if you were cooking a piece of meat, just without the meat inside.
Turn Up the Heat
First, turn the heat on to around 300 degrees. Simply leave the heat on for about 2 hours. After waiting for 2 hours, add a handful of wood chips to the tray and continue with the heat on for at least another hour, making 3 hours total. The wood chips will help make the inside a little hotter and burn out any substances that you don’t want in there.
Clean the Inside
After the initial heating of your smoker, let it cool down. Once it’s completely cooled down, take a cloth or rag and wipe down the inside of your unit. It’s extremely important that you don’t skip this step to make sure your unit is cured and ready for its first use!
I know the curing process might seem like overkill or unnecessary, but I promise you it is! The good news is, you only have to do this one time and then you are good to go after that.
Frequently Asked Questions
How do I clean the heating element in my electric smoker?
Gently wipe down the heating element with a soft cloth or brush to remove any accumulated grease or residue. Be very careful not to get the element wet when cleaning.
What’s the best way to clean the wood chip tray?
The wood chip tray can get caked with ash and debris over time. To clean it, soak the tray in warm soapy water to loosen any built-up residue. Then use a scrub brush to remove any remaining debris.
Should I clean the temperature probe?
Yes, periodically wiping down the temperature probe with a damp cloth and mild detergent will help keep temperature readings accurate. Avoid submerging the probe in water.
How can I prevent rust inside my electric smoker?
Applying a light layer of cooking oil to the interior metal surfaces after cleaning can help prevent rust between uses. Make sure to wipe off any excess oil before smoking foods again.
What if I have really stubborn grease buildup?
For tough grease that won’t come off with regular cleaning, try making a paste of baking soda and vinegar. Apply the paste and let it sit for 15 minutes before scrubbing. Rinse very thoroughly after cleaning.
How do I get rid of odors in my electric smoker?
Placing a bowl filled with charcoal or coffee grounds inside for a few hours can help absorb stubborn odors before your next use. Remove the bowl before smoking food.
Should I check the door seal when cleaning?
Yes, inspect the door seal and make sure it is intact. Replace the seal if it appears cracked or worn to ensure smoke and heat stay inside the smoker.
Final Thoughts
There it is! That’s everything you need to know for how to clean an electric smoker. Simply follow these steps and your smoker will last you a decade or more. Once your electric smoker is sparkly clean you can try out our favorite electric smoker recipes.


