So you invested the time and money to smoke an out of this world brisket. Or maybe you picked up some brisket at your local BBQ joint. Either way, odds are you’re going to have some leftovers to manage. It would be sinful to let a delicious brisket go to waste!
The question is, what are the best methods for reheating brisket? You’ll want to do everything you can to get the most flavor and tenderness out of your leftovers. There are a few different ways for reheating brisket – some faster than others and all leading to slightly (or not so slightly) different results.
In this article, we’ve made a complete guide to reheating brisket. We’ll go over all the best ways to reheat brisket and cover the pros and cons of each different method we take a look at.
Reheating Brisket – Quick Overview
When we think about reheating brisket, it’s important to put this delicious cut of meat into context.
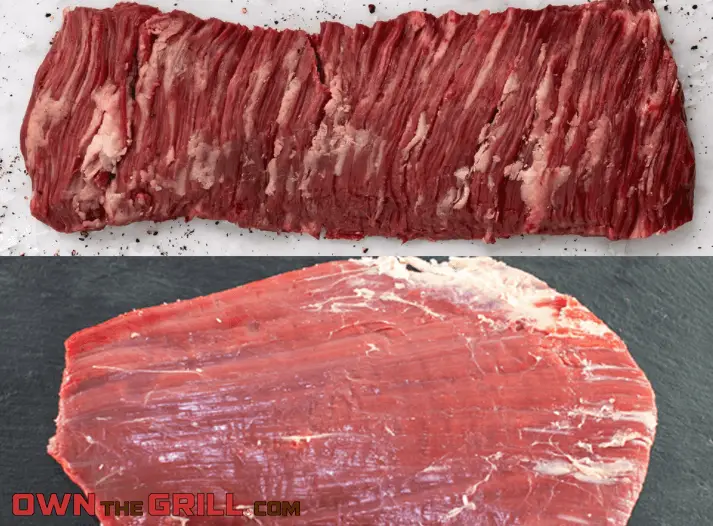
By nature, beef brisket is a tougher cut of meat to work with compared to others. That’s because brisket comes from the lower chest area of a steer and is essentially a muscle that constantly burdens the weight of these massive animals.
This is the exact reason that you use a smoker to cook brisket. On a smoker, an hours long low and slow cooking process allows your brisket to tenderize and remain moist – so that way you end up with the delicious flavor and texture that we’ve all come to love with brisket.
When you’re reheating brisket, the goal is the same. We want to preserve the tenderness and moisture and bring the delicious flavors forward. The last thing we want to do is dry out our leftovers.
A Quick Note on Proper Storage
Really, the process for reheating brisket starts with how you store it. Storing your meat the right way will directly impact the level of flavor and tenderness you’ll be able to achieve later.
If your leftover brisket is unsliced, first wrap your brisket as tightly as possible with cling wrap. After that, wrap a layer of aluminum foil around your brisket and the cling wrap. From there, place the aluminum foil and plastic wrapped brisket into a sealable bag. All of these layers help to prevent freezer burn and to keep foreign flavors and smells off of your leftovers.
No matter whether you’re storing brisket slices or a whole brisket, be sure to include the juices and drippings in the storage container! You’ll want these juices during the reheating process to help with moisture levels.

- Dishwasher, microwave, and freezer safe
- Large containers are perfect for brisket, pulled pork, or other BBQ leftovers
- Stackable for easy organization
Refrigerator vs Freezer
You can store brisket in a refrigerator or a freezer. If stored in a refrigerator, it will last for 2 or 3 days – after that you should probably throw it out.
Brisket in a freezer will technically last indefinitely, but in practice plan on reheating or eating within 2 to 3 months of putting it in your freezer. After that, your food will start to lose its flavor and freezer burn becomes more likely.
How to Properly Thaw a Frozen Brisket
Another component of reheating brisket – especially if you’ve stored it in the freezer, is the brisket thawing process. With some foods, you can thaw in the microwave. With brisket, that’s not really the case – and you want to keep your brisket far far away from the microwave (we’ll elaborate more on that later).
So with that in mind, the best thing you can do is to plan ahead. It’s best to know ahead of time when you plan to reheat your brisket so that you can properly and safely thaw it beforehand.
Note – the USDA has a very helpful guide right here about safely thawing foods that’s good knowledge for anybody to learn.
Basically, there are two methods that are generally recommended for thawing a frozen brisket.
The first choice would be to thaw it in the refrigerator. This method takes a little bit of planning though as it can take 1 to 2 days for a whole brisket to thaw in the refrigerator. But if you know ahead of time when you’ll want your leftovers, the best thing to do is to place your brisket in the fridge 36-48 hours before it’s go time.
The second way to thaw a brisket is by placing it in a bowl and running cold water over it until it thaws. It’s important to note here that your brisket must be completely covered and sealed in an airtight bag.
Reheating Brisket in the Oven
Using a conventional oven to reheat brisket is probably the easiest and most effective method. Here’s a step by step guide for using an oven to warm up your leftovers:
- Preheat your oven to 300°F.
- Place your brisket in a baking pan, including any juices and drippings you saved. If you didn’t save the juices, other liquids like broth or apple juice can be substituted.
- Cover the pan and brisket with aluminum foil.
- Place your brisket into the oven. If it’s a whole brisket, plan on your meat taking about an hour to get to temperature. If your brisket is sliced, plan on warming for 20-25 minutes.
- Check your meat’s internal temperature with a probe thermometer. Your brisket is done warming after it reaches an internal temperature of 160°F.
- Serve and enjoy!
Reheating Brisket on the Grill or Smoker
If you are feeling ambitious and want to fire up your grill or smoker to reheat your brisket, it’s essentially the same process as using an oven. There are a couple of added steps though, and if your smoker temperature is lower then your heating time will take longer.
- Light your grill (indirect heat set up) or smoker to a temperature of 300°F.
- Place your brisket and drippings into a baking pan or an aluminum foil pan.
- Wrap your brisket and pan with foil.
- Place your brisket and pan on your cooking grates. For unsliced brisket, plan on reheating for around an hour. For sliced brisket, plan on reheating for 20-25 minutes.
- Your brisket is done heating when it reaches an internal temperature of 160°F. Confirm this with a probe thermometer.
- Serve and enjoy!
Reheating Brisket Sous Vide
The sous vide method is a great way to reheat just about anything, really. The “catch” is that you need to have a sous vide machine handy.
Sous vide is a methodology where vacuum sealed food is slowly heated in a bath of warm/hot water until it’s been brought up to temperature.
The great thing about the sous vide method is that it ensures you’ll never overcook your brisket, and it’s incredibly easy to achieve moist and tender results. It just takes a lot of guesswork out of the process.
If using the sous vide method, you still want to cook until your brisket reaches an internal temperature of 160°F. Set your machine to this heat setting, and cook your brisket until this temperature is reached.
Reheating Brisket in the Microwave
Typically my advice for those wanting to reheat brisket in the microwave is don’t.
Remember, brisket is by nature a tough cut of meat. A lot of time and work on the smoker goes into turning it into a moist and delicious masterpiece.
You’ll be prone to easily overcooking your brisket in the microwave. Not only that, but the microwaving process generally makes your brisket dry and tough. More often than not, you’ll be left with poor tasting, tough, chewy, leathery brisket. It’s truly a waste to reheat good brisket in the microwave.
If you absolutely HAVE to use a microwave because you’re pinched for time, turn your microwave to 20% power and cook it in 30 second intervals to not overcook it. Also be sure to include juices in your bowl or spritz with broth or apple juice. I still wouldn’t recommend doing this, but this is a way to get edible results when reheating brisket in the microwave.
Leftover Brisket Recipes
If you want to get creative with your reheated brisket, one of my absolute favorite things to do is to make chopped brisket tacos. It’s a great way to add a little variation if you had the brisket “regular” last time.
You can also throw leftover brisket on some smoked mac and cheese… yum!
All you need is a couple of extra store bought ingredients and you are ready to have a delicious meal. For my brisket tacos, I like to get pico de gallo, sliced avocado, and my reheated brisket on a corn tortilla. From there just add salt and pepper to taste and viola.
Check out our leftover brisket tacos and brisket mac and cheese recipes if you want to get inspired ideas for your reheated brisket.
Final Thoughts
We could all use more brisket in our lives. Whether you made it yourself or bought it from a BBQ restaurant, knowing how to reheat brisket the right way is important to get the most out of your beef!
Hopefully now that you’ve read our guide on reheating brisket, you’ve got all of the knowledge you need to do it yourself at home.
If you want some more knowledge on how to best reheat different types of meat, check out our reheating pulled pork and reheating chicken wings guides next.
Discover more from Own The Grill
Subscribe to get the latest posts sent to your email.