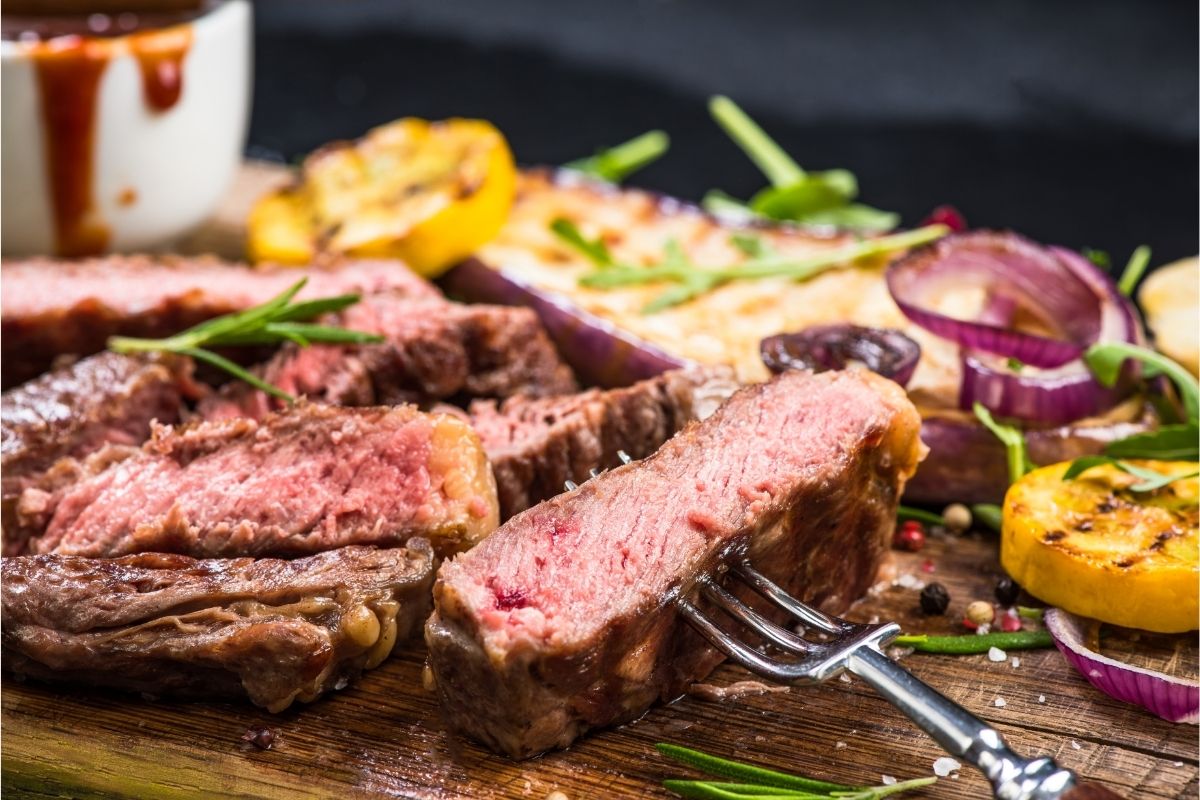
Where I come from, BBQ brisket is almost a way of life. If you want to go down in the history books with legendary status amongst family and friends, all you need to do is smoke a perfect brisket.
Of course, doing that is much easier said than done. Brisket is a tough cut of meat and requires time, patience, and finesse to smoke it the right way.
One of the perhaps more overlooked steps in the brisket process is the trim. But knowing how to trim a brisket properly can mean the difference between glory and sub par results.
If you’re going to put the time, money, and effort into smoking a brisket, you might as well get started off on the right foot with a solid brisket trimming job!
In this article, we’ve created a complete guide for how to trim a brisket. By the end, you’ll have a nice idea of what you need to do to prepare your brisket for success. We’ll also cover some of the basics of brisket and tips for getting the most out of your big hunk of BBQ.
What is Brisket? A Quick Overview
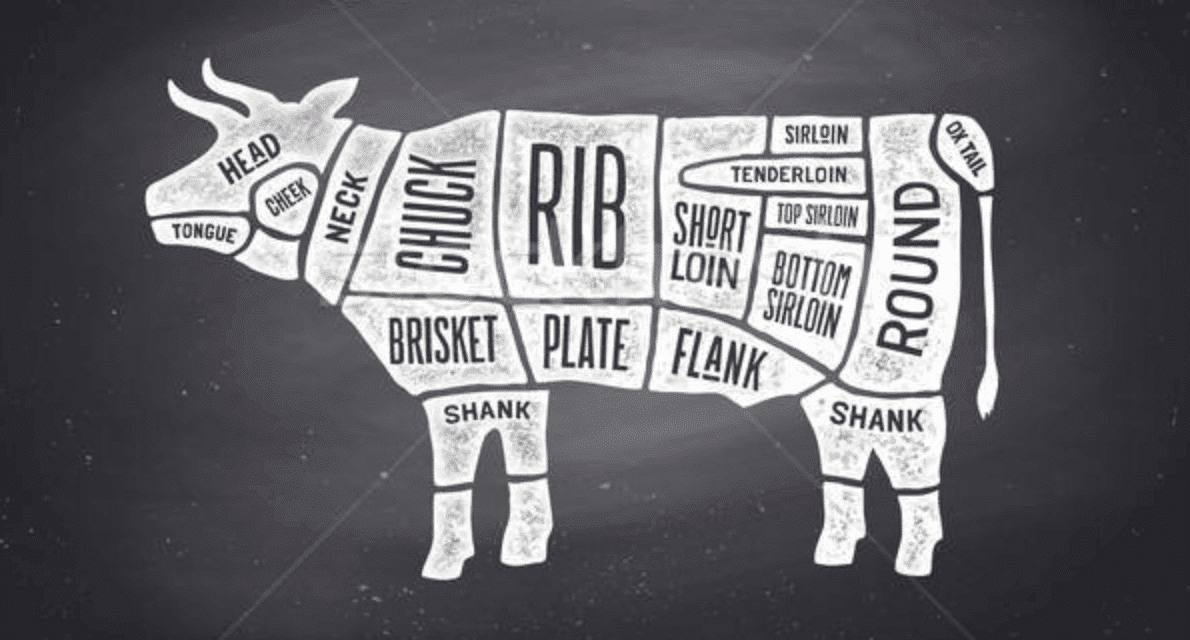
In the anatomy of a steer, a brisket comes from the front chest section of the animal. The brisket is a very tough cut of beef by nature because it’s essentially the muscle that holds up the entire weight of the steer.
The toughness of brisket is the reason why it’s ideally cooked on a smoker – the meat needs lots of time on low heat for fat to render and connective tissues to break down.
Each steer yields two cuts of brisket – a whole brisket is also known as a “packer” brisket and can often weigh 20 or more pounds. And the packer brisket can be broken down into two main parts – the brisket point and flat.
It’s not uncommon for a butcher or grocer to divide up a packer into smaller sections for sale – about 8 to 12 pounds per section.
It’s important to be aware of a few different parts of the brisket itself, and the terminology that goes along with each part.
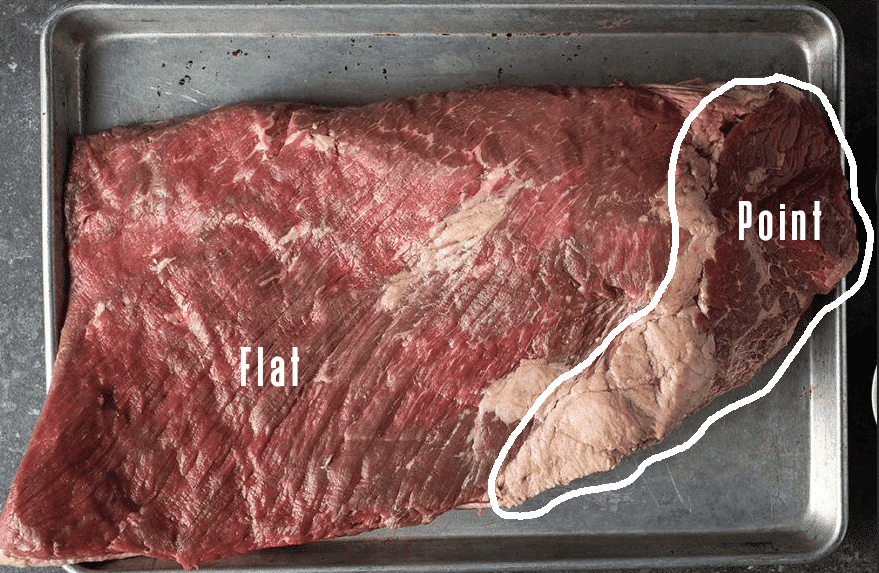
The Flat
The brisket flat is a part of a brisket that is lean, usually with a noticeable amount of marbling, and takes up the majority of the brisket. It’s usually rectangular in shape and as the name suggest, could lay flat on a table. It’s long and thin and most often has a thick layer of fat on top, which helps to keep the meat moist while it smokes.
The Point
The brisket point (also known as the Deckle) is the other main section of the cut, and is thicker and marbled with fat throughout the entire cut. It also has more connective tissue than the flat, and generally doesn’t have as much meat volume as the flat. However, the point is packed with flavor thanks to the high fat content and marbling.
The Fat Cap
Running on top of one entire side of a brisket is a layer of fat known as the fat cap. It typically covers the entire flat and separates a few of the muscles in between the flat and the point. Many briskets you’d buy from the butcher come with the fat cap included although some butchers will remove it in advance before selling.
Equipment You’ll Need to Trim Brisket
Having a few key pieces of equipment on hand will make the trimming process much easier.
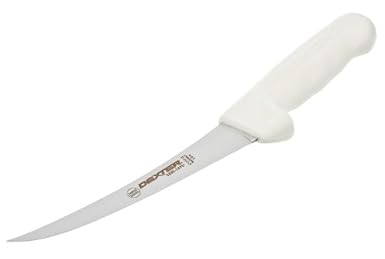
First, make sure you have a sharp knife on hand. A dull knife makes the job much more difficult and dangerous, so the most important thing you can do is make sure your knife is properly sharpened. And if you don’t have a slicing or carving knife on hand, check out our resource on the best brisket knives for slicing and trimming for some suggestions!
Next, it’s best to have a large cutting board or butcher block to place your brisket on while you work. Utilizing a cutting board will make any messes a little more manageable, and your cleanup process will be much easier.
Last but not least, a handy trash bag is a good idea for discarding chunks of fat and trimmings that you cut off of your meat.
How to Trim a Brisket – Step By Step
Here’s a step by step guide for how to trim a brisket like the pros! A lot of the steps might be easier to understand when visualized vs read, so at the end we’ve also included a great video to show visually how to trim a brisket.
- Step 1: Grab your knife, cutting board, and trash bag and get your work area set up. Place your brisket on the cutting board, fat cap side up.
- Step 2: Trim off any excess pieces of fat or meat that hang loosely off of the outsides of your brisket to “square” it up. The goal here is simply to remove any chunks or pieces that could burn during the cook.
- Step 3: Starting at the point end of the brisket, carve out the large chunk of fat that runs across the top of the brisket. Do this by scoring on either side of the fat chunk, starting at the point end and running your scores to where the point meets the flat.
- Step 4: Next flip your brisket and carve fat off of the point. The goal is to expose meat on the surface so that your rub can absorb into the meat. Avoid cutting too deep into the meat and err on the side of taking little pieces of fat off at a time until you get the hang of things. You can always cut more off, but it’s impossible to put meat back on the brisket!
- Step 5: Flip the brisket back over so that the fat cap is on top of the flat. We want to end up with about a 1/4 inch uniform layer of fat across the entire flat. Some butchers will sell briskets with the fat cap layer already pretty close to this thickness, in which case you can thank them! A uniform layer of thin fat will lead to even cooking. Look for any portions of fat that stick out and carefully carve them down until the layer is completely even.
- Step 6: Flip the brisket over with the fat cap on the bottom. Next, carve out the thick V of fat near the end of the point. You’ll be left with a fairly large cavity in your brisket after completely removing this section of fat.
- Step 7: Last call for trimming! Take one last look at your brisket and make sure there aren’t any protrusions of fat or any chunks hanging off of the sides that could cause issues on the smoker.
- Step 8 (Optional): Personally I prefer to cook the whole brisket, but if you’re limited by space or prefer to separate the flat from the point, you can do that now. If you want to separate the flat and point, slice through from the cavity we created in step 6.
It definitely takes some practice to get the hang of how to trim a brisket. As promised, here is a great video to help visualize the steps we outlined above:
Safety First
This wouldn’t be a true “how to” article without mentioning some safety guidelines when trimming a brisket. You’re dealing with a sharp knife and some unnatural cutting angles, and it’s easy to get lulled into putting yourself in a dangerous position if you aren’t careful.
Remember always to slice away from your body. The last thing you need is to be cutting towards yourself with force, get hung up on a tough piece of fat, carve through it and with momentum slice yourself on the follow through. You can eliminate 99% of the probability of something going wrong simply by making sure you stroke your slices with the blade going away from you.
I’d also consider wearing a pair of kitchen or BBQ gloves to help reduce the risk of slicing fingers or hands. It’s nice to have an extra layer of protection in the unlikely event that an accident occurs.
How to Finish Preparing Your Brisket
Now that your brisket is nice and trimmed, there’s just a little more prep work before it goes on the smoker.
Namely, it’s time to rub it down to add flavor and bring the most out of your glorious hunk of trimmed meat.
There are lots of philosophies out there when it comes to seasoning BBQ. I come from the Texas, Aaron Franklin school of BBQ where salt and pepper are the kings of seasoning – so I just keep things simple with a generous coat of a salt and pepper rub.
That’s not to say this is the only way or even the “right” way to season a brisket. There are plenty of brisket rub recipes out there with many more spices and seasonings that yield delicious results.
Aside from that, the other prep consideration is whether or not you want to wrap your brisket. Wrapping your brisket in foil, pink butcher paper, or smoking it bare will yield discernibly different results. Check out our guide to wrapping brisket for more information on how different wraps affect the outcome of a smoked brisket – and also check out our thoughts on the fat side up or down debate.
One last tip, have a probe thermometer handy. Your brisket will be on the smoker for 8 to upwards of 12 hours, depending on the size. You absolutely should not wing it when it comes to the readiness of a brisket – the only way to know it’s finished is by measuring internal temperature with a probe meat thermometer.
Other Brisket Considerations
Here are a few other factors to consider when it comes to smoking a brisket:
Size and Thickness
Size matters with just about anything when it comes to both grilling and smoking, but it especially matters when it comes to brisket.
Since it’s naturally such a large and tough primal cut of beef to work with, it has to spend a lot of time cooking on low temperatures. A larger brisket can easily add an hour or two to your cooking time, which is definitely something to take into consideration.
The other consideration here is the amount of food you’ll be left with. If you’re cooking for a large cookout crowd or tailgate, your brisket might all be consumed at once. But if you buy a 20 pound brisket for a family of 4, well, you could be having leftover brisket tacos for weeks. Not that there’s anything wrong with that 🙂
The point is, make sure your brisket size is well suited to the needs of your eaters – and make sure your smoker is large enough to handle the brisket you pick out.
Grades of Beef
In the USA, the Department of Agriculture grades beef as an indicator to consumers of the quality of the food they might potentially purchase.
There are really only three USDA grades of beef that you’ll come across in any normal grocer or butcher, and they are: Prime, Choice, and Select.
Out of these three, Select grade cuts are the least high in quality (although still very edible). They might have a reasonable amount of fat and marbling, but they’ll be noticeably less tender and moist than Choice and Prime.
Choice cuts of beef have stronger marbling and moisture content and are a definite step above from Select, although they still can be lacking in the level of moisture you’d like to see in a brisket.
Prime beef is where the quality is truly at, and are the type of cuts you’d find at your local BBQ restaurant. They have beautiful marbling, tenderness, and moisture and are ideal if you’re looking for the best of the best.
For brisket, we recommend sticking to at least Choice – and then Prime is also a fantastic option. Select grade brisket simply isn’t moist or high enough in fat content to be worth all of the effort required of cooking a brisket.
Wagyu brisket is also an option – although an expensive one. These animals are the most sought after when it comes to beef cuts, and their meat feature some of the most robust and thorough fat marbling you will ever see – which is a large reason why the resulting beef is so tasty.
If you’re really looking to make a splash with your eaters, scoop up a Wagyu brisket. You might be able to find them at your local butcher or you could also pick one up through an online butcher such as Snake River Farms.
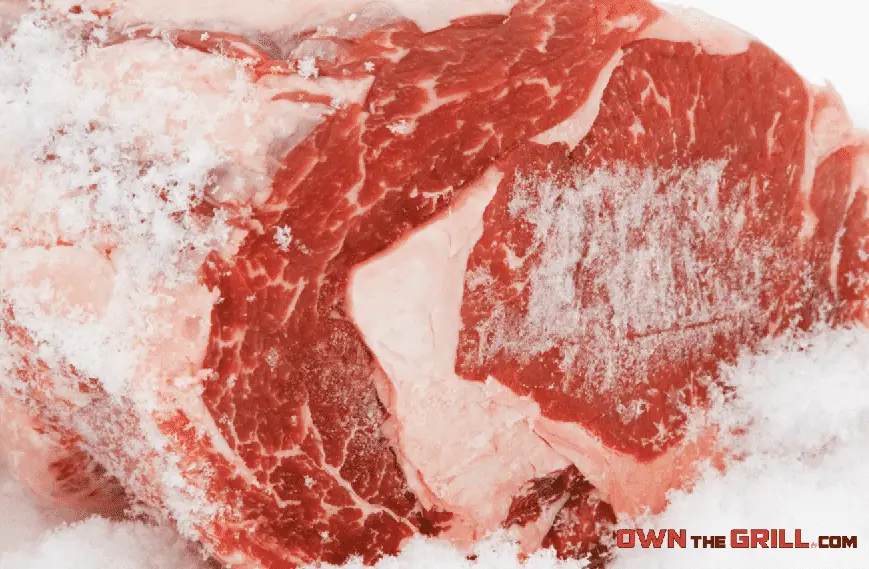
Fat Coloration
When it comes to brisket, you want to stick with cuts that feature fat that is white in color and fairly hard for the best flavor. If possible, avoid briskets that have yellow coloration in the fat.
White fat is an indicator of grain feed steers, and yellow is an indicator of grass fed. Purely from a flavor perspective (as there is a debate out there about the healthiness of grain fed vs grass fed), grain fed simply wins out. It’s especially important with brisket because the fat plays such a crucial role in the cooking process.
Smoke Flavoring
Your brisket might spend a lot of time on the smoker – as many as 8 to 12 hours in fact. Especially if you know how to trim a brisket properly, that’s a lot of time for charcoal or wood smoke to absorb into your hunk of brisket.
There are a few types of wood that are definitely more ideal for a brisket than others. Hickory, Oak, and Cherry, to name a few are at the top of the list of choices I’d use for cooking brisket. If you want to learn more on this topic, check out our resource about the best wood for smoking brisket next.
Patience is Key
If you’re new to smoking briskets, just know in advance that it’s a slow dance. You can’t cheat any part of the process, so a little bit of patience goes a long way. Especially when your beef is in the middle of the brisket stall, just wait it out and you’ll be rewarded with fantastic BBQ.
How to Know Your Brisket is Finished
The USDA recommends that beef is “done” at an internal temperature of 145°F. But there’s a huge difference between “done” and “finished”.
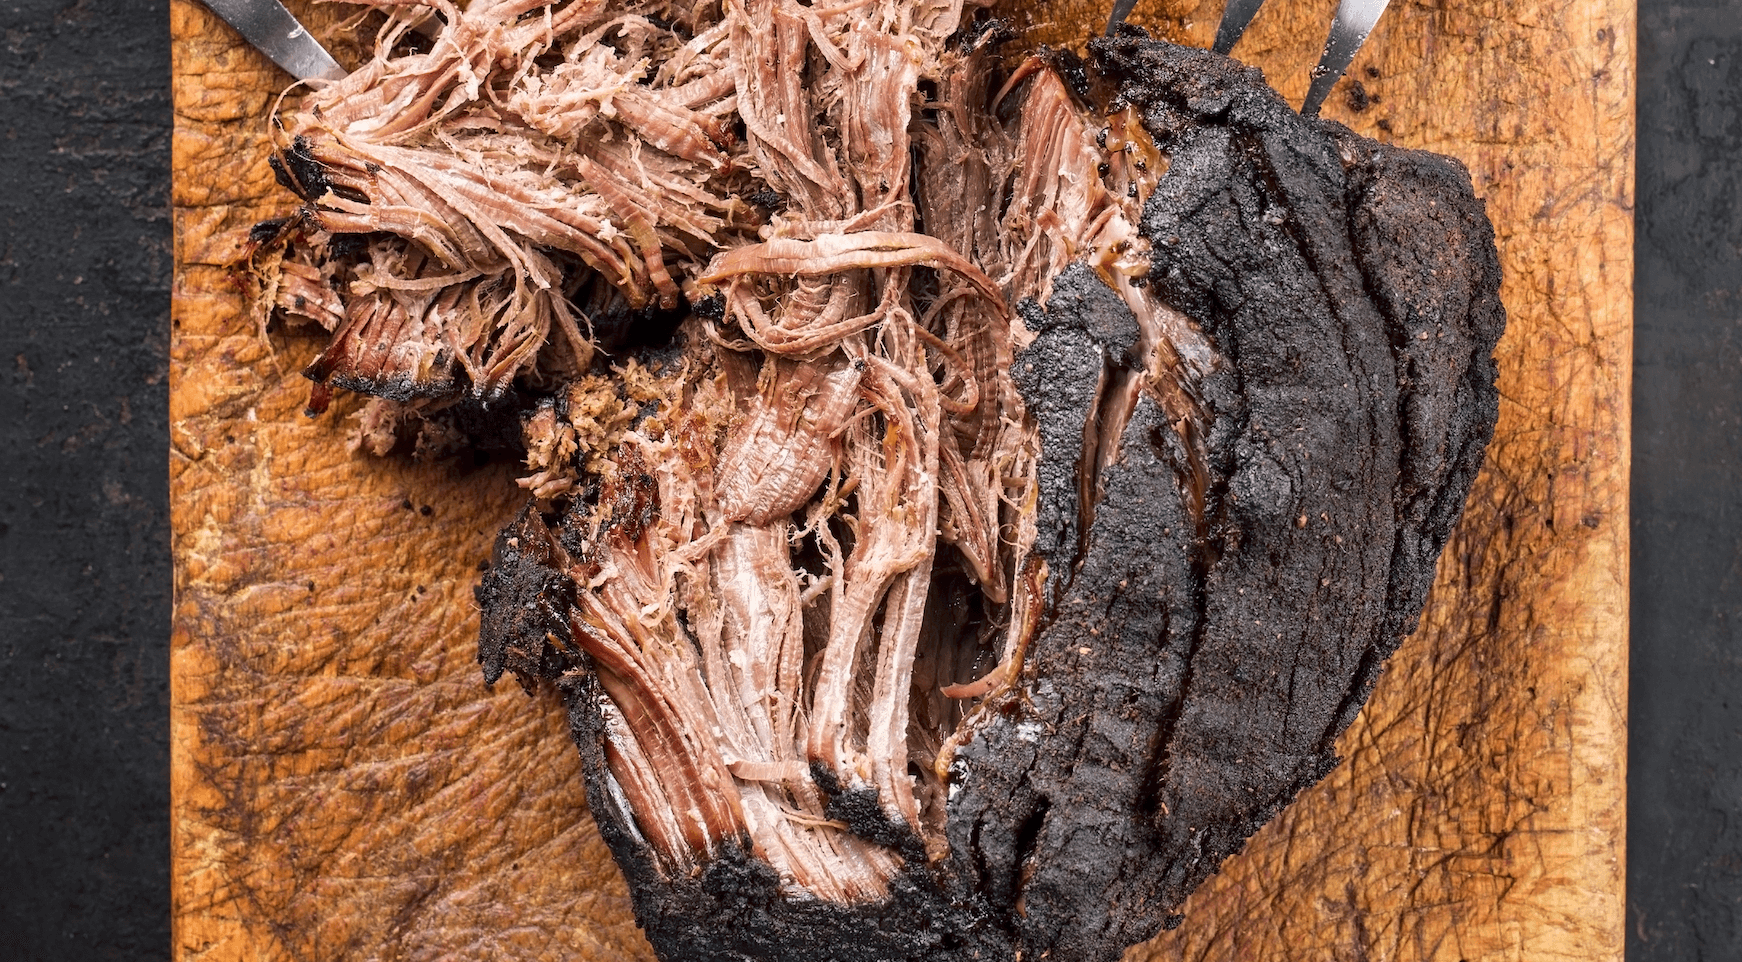
Remember, brisket is an incredibly tough cut of beef, and it needs lots of time on the smoker at low heat for connective tissues to break down, fat to render, and for the meat to tenderize.
Almost all professional brisketeers would agree that the “finished” range is when the center of the meat reaches an internal temperature of 190°F to 205°F. The legend Aaron Franklin himself takes his brisket off the smoker at an internal temperature of 203°F.
Final Thoughts on How to Trim a Brisket
In my very humble opinion, a properly smoked brisket is one of the highest achievements a backyard BBQ master can achieve. The end results are delicate, delicious, tender, and full of beefy flavor.
A great end result begins with preparation, and the biggest component of properly preparing this cut of beef is knowing how to trim a brisket. Hopefully by now, you’re well on your way to knowing exactly what you need to do to get started!
Did we miss anything? We’d love to hear your thoughts and anything you have to add for how to trim a brisket in the comments section below.
Discover more from Own The Grill
Subscribe to get the latest posts sent to your email.